Braeburn Thermostat Manual: A Comprehensive Guide
This manual details Braeburn thermostat operation‚ installation‚ troubleshooting‚ and advanced features‚ covering models like the 5220. It assists with setup and resolving common issues.

Understanding Your Braeburn Thermostat

Braeburn thermostats are designed for efficient home climate control‚ offering programmable settings for heating and cooling. These systems cater to various needs‚ from basic temperature regulation to advanced scheduling. Understanding the core functionalities is key to maximizing energy savings and comfort. Models‚ such as the 8400 series‚ provide user-friendly interfaces for easy operation.
The thermostat interacts with your HVAC system – furnace‚ air conditioner‚ or heat pump – to maintain desired temperatures; Proper installation and wiring (refer to diagrams) are crucial for optimal performance. Features like fan control and temperature swing adjustments allow for personalized comfort levels. Familiarizing yourself with error codes and troubleshooting steps‚ as outlined in this manual‚ will help resolve common issues quickly and efficiently‚ ensuring a consistently comfortable home environment.
Thermostat Model Numbers & Identification
Identifying your specific Braeburn thermostat model is crucial for accessing the correct documentation and support. Common models include the 5220‚ 5020‚ and 8400 series. The model number is typically located on the back of the thermostat unit or on the original packaging. This number dictates the features and functionalities available.
Braeburn offers a range of thermostats‚ from basic non-programmable units to advanced Wi-Fi enabled models. Knowing your model allows you to download the appropriate installer SP (Service Provider) manual‚ like the 8400 Spanish version (110-1086B PDF). Correct identification ensures compatibility with wiring diagrams and troubleshooting guides. Referencing the model number when contacting customer support will expedite assistance and ensure accurate solutions to any issues you may encounter.
Initial Setup and Installation
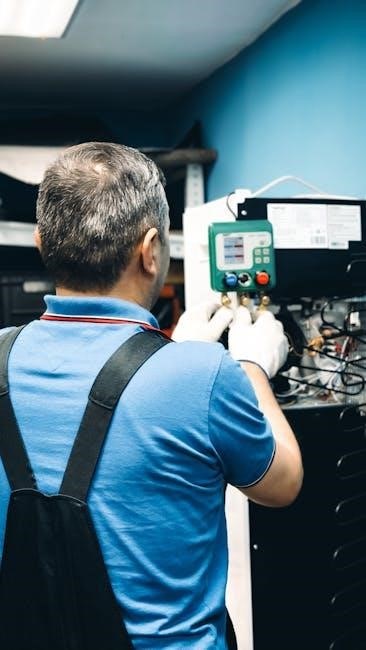
Proper installation is vital for optimal Braeburn thermostat performance. Before beginning‚ ensure the power to your HVAC system is completely shut off at the breaker. The installation process involves mounting the thermostat base to the wall and carefully connecting the wires according to the appropriate wiring diagram for your specific system.
Refer to the installer SP manual (e.g.‚ Braeburn 5020-5220) for detailed instructions and wiring schematics. Incorrect wiring can damage your HVAC equipment or the thermostat itself. Double-check all connections before restoring power. Ensure the thermostat is level and securely mounted. Following these steps will guarantee a smooth setup and reliable operation of your new Braeburn thermostat.
Mounting the Thermostat Base
Securely mounting the base is the first physical step. Begin by removing your old thermostat baseplate‚ carefully labeling each wire as you disconnect it – this is crucial for correct re-connection. Use the provided mounting screws and anchors to attach the Braeburn baseplate to the wall‚ ensuring it’s level for accurate temperature readings.
The baseplate should be positioned in a location away from direct sunlight‚ drafts‚ and other sources of temperature interference. Utilize a level to confirm proper alignment before fully tightening the screws. A stable and level base is essential for the thermostat’s functionality and longevity. Refer to the installation guide (like the 5020-5220 Installer SP) for specific mounting details.
Wiring Diagrams for Common Systems
Correct wiring is paramount for proper operation. Braeburn thermostats accommodate various heating and cooling systems‚ including conventional‚ heat pump‚ and dual-fuel configurations. Consult the wiring diagram specific to your system – often found within the installer guide (e.g.‚ 8400 Thermostat Manual Spanish).
Common terminals include Rh/Rc (power)‚ W (heat)‚ Y (cool)‚ and G (fan). Carefully match the wires labeled during old thermostat removal to the corresponding terminals on the Braeburn base. Incorrect wiring can damage the thermostat or your HVAC system. If unsure‚ consult a qualified HVAC technician. Diagrams illustrate connections for single-stage‚ multi-stage‚ and communicating systems‚ ensuring compatibility and optimal performance.
Powering On and Basic Operation
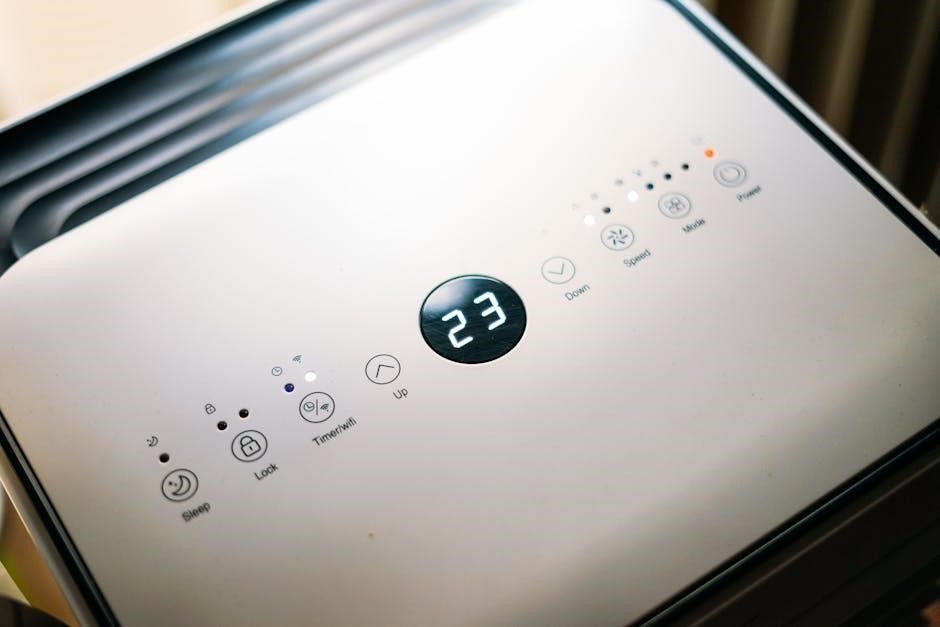
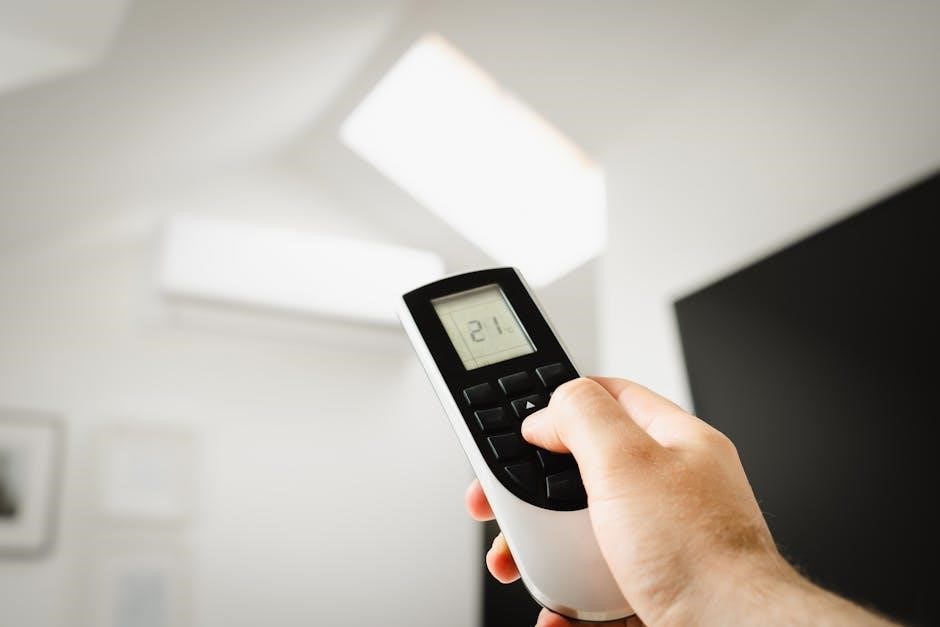
After correct installation and wiring‚ your Braeburn thermostat should power on automatically. The display will illuminate‚ showing the current room temperature and setpoint. Use the up and down arrow buttons to adjust the desired temperature. The ‘Mode’ button cycles through Heat‚ Cool‚ Off‚ and Auto settings. Ensure the system type configured during setup matches your HVAC system.
The ‘Fan’ button controls fan operation: Auto (fan runs only during heating/cooling) or On (fan runs continuously). Familiarize yourself with the display icons indicating heating‚ cooling‚ and fan status. Basic operation involves setting the desired temperature and mode for comfortable and efficient climate control. Refer to the manual for specific button functions on your model.
Programming Your Braeburn Thermostat
Braeburn thermostats offer programmable schedules for energy savings and customized comfort. Access the programming mode via the ‘Menu’ or ‘Program’ button – consult your specific model’s manual. You’ll typically define separate schedules for weekdays and weekends. Within each day‚ you can set multiple periods with different temperature setpoints.
Creating a heating schedule involves setting desired temperatures for ‘Wake’‚ ‘Leave’‚ ‘Return’‚ and ‘Sleep’ periods. Similarly‚ a cooling schedule allows temperature adjustments for optimal comfort during warmer months. Save your programmed schedule to activate it. Review the schedule regularly to ensure it aligns with your lifestyle and energy-saving goals.
Setting the Date and Time
Accurate date and time settings are crucial for proper scheduling functionality on your Braeburn thermostat. Begin by entering the programming or settings menu‚ usually accessed via a ‘Menu’ or ‘Set’ button. Navigate to the ‘Date’ and ‘Time’ options using the arrow keys. The current date will likely be displayed in a MM/DD/YYYY format‚ and time in HH:MM (24-hour or AM/PM‚ depending on the model).
Use the up and down arrows to adjust each value. Confirm each selection by pressing ‘Set’ or ‘Enter’. Ensure the correct year is set‚ especially after a battery change. Incorrect date/time settings will cause scheduling errors. Save the changes to finalize the process.
Creating a Heating Schedule
Establishing a heating schedule optimizes comfort and energy savings. Access the programming mode via the ‘Menu’ or ‘Schedule’ button on your Braeburn thermostat. Typically‚ you’ll define periods like ‘Wake‚’ ‘Leave‚’ ‘Return‚’ and ‘Sleep’ for each day of the week. For each period‚ set the desired temperature. For example‚ ‘Wake’ might be 70°F‚ ‘Leave’ 62°F‚ ‘Return’ 70°F‚ and ‘Sleep’ 65°F.
You can often copy a schedule from one day to others for convenience. Ensure the schedule aligns with your daily routine. Review the programmed schedule carefully to avoid unintended temperature settings. Save the schedule to activate it; the thermostat will then automatically adjust temperatures based on your preferences.
Creating a Cooling Schedule
Similar to heating‚ a cooling schedule maximizes comfort and efficiency during warmer months. Navigate to the programming section of your Braeburn thermostat‚ often accessed through a ‘Menu’ or ‘Schedule’ button. Define cooling periods – ‘Wake‚’ ‘Leave‚’ ‘Return‚’ and ‘Sleep’ – and assign a target temperature to each. A typical ‘Wake’ setting might be 75°F‚ ‘Leave’ 78°F‚ ‘Return’ 75°F‚ and ‘Sleep’ 80°F.
Copying schedules between days simplifies setup. Verify the cooling schedule matches your lifestyle to prevent unnecessary energy consumption. Save the programmed schedule to activate automatic temperature adjustments. Regularly review and adjust the schedule as seasons change or your routine evolves.
Advanced Features and Settings
Braeburn thermostats offer several advanced settings to fine-tune your comfort and energy savings. Fan Control Options allow you to select ‘Auto’ (fan runs only during heating/cooling) or ‘On’ (continuous fan operation). Temperature Calibration adjusts the displayed temperature if it doesn’t match a trusted thermometer – crucial for accurate readings.
The Swing Temperature Adjustment controls the temperature range around the setpoint‚ preventing frequent cycling. Explore settings for filter change reminders and backlight dimming. Some models support smart home integration for remote control. Consult your specific model’s manual for detailed instructions on accessing and configuring these features.

Fan Control Options
Braeburn thermostats provide flexible fan control to optimize air circulation and comfort. The primary options are ‘Auto’ and ‘On’. Selecting ‘Auto’ means the fan operates solely during heating or cooling cycles‚ enhancing energy efficiency by minimizing unnecessary runtime. Conversely‚ choosing ‘On’ keeps the fan running continuously‚ providing consistent air mixing and potentially improving air quality.
Continuous fan operation can also help distribute temperature more evenly throughout your home. Some models offer a ‘Circulate’ setting‚ running the fan intermittently to maintain consistent temperatures. Refer to your specific thermostat model’s manual for detailed instructions on accessing and adjusting these fan control settings.
Temperature Calibration
Temperature calibration allows you to adjust the thermostat’s displayed temperature to match a trusted external thermometer. Discrepancies can occur due to thermostat location or environmental factors. Accessing the calibration feature typically involves navigating through the thermostat’s settings menu – consult your specific model’s manual for precise steps.
Calibration is usually expressed in degrees Fahrenheit or Celsius. Incrementally adjust the displayed temperature until it aligns with your reference thermometer. Small adjustments are recommended; avoid large calibration changes. Accurate calibration ensures your heating and cooling systems operate efficiently and maintain desired comfort levels. Regularly verifying calibration is good practice.
Swing Temperature Adjustment
The “swing” or “temperature differential” setting controls the temperature range around the setpoint before the thermostat activates heating or cooling. A smaller swing means the system cycles on more frequently‚ maintaining a more consistent temperature‚ but potentially increasing energy use. A larger swing allows for more temperature fluctuation‚ reducing cycling and potentially saving energy.
Adjusting the swing is typically found within the advanced settings menu. Consider your comfort preferences and energy-saving goals when setting this value. For example‚ a 1-degree swing provides tighter control‚ while a 3-degree swing offers greater efficiency. Experiment to find the optimal balance for your home and lifestyle. Refer to your model’s manual for specific instructions.
Troubleshooting Common Issues
Encountering problems with your Braeburn thermostat? Several common issues have straightforward solutions. If the thermostat isn’t powering on‚ check the batteries (if applicable) or the circuit breaker. Incorrect temperature readings often indicate calibration is needed‚ accessible through the settings menu. Connectivity problems‚ for Wi-Fi models‚ usually resolve with a router reset or re-entering network credentials.
Before contacting support‚ verify wiring connections are secure. If issues persist‚ consult the error code section of this manual for specific diagnostics. Remember to note the model number when seeking assistance. A systematic approach‚ starting with basic checks‚ can often quickly restore functionality.
Thermostat Not Powering On
If your Braeburn thermostat displays no power‚ begin with the simplest checks. For battery-powered models‚ replace the batteries with fresh ones‚ ensuring correct polarity. If hardwired‚ verify the circuit breaker controlling the HVAC system hasn’t tripped. Inspect the wiring connections at the thermostat base and the furnace control board – loose wires are a frequent cause.
Confirm the thermostat is securely mounted to the base‚ as a poor connection can interrupt power. If the problem continues‚ a faulty transformer within the HVAC system might be the culprit‚ requiring professional diagnosis. Always disconnect power before inspecting wiring.
Incorrect Temperature Readings
If your Braeburn thermostat displays inaccurate temperatures‚ several factors could be at play. First‚ ensure the thermostat isn’t directly exposed to sunlight‚ drafts‚ or heat-generating appliances‚ as these can skew readings. Check for obstructions blocking airflow around the unit. Utilize the temperature calibration feature within the settings menu to adjust the displayed temperature to match a known accurate thermometer.
Consider the ‘swing temperature adjustment’ – a wider swing can lead to perceived inaccuracies. If issues persist‚ verify proper wiring connections. A failing internal temperature sensor may necessitate professional repair or thermostat replacement.
Connectivity Problems (if applicable)
If your Braeburn thermostat experiences Wi-Fi connectivity issues‚ begin by verifying your home network is functioning correctly. Ensure the thermostat is within range of your router and that the Wi-Fi password entered during setup is accurate. Restart both the thermostat and your router to refresh the connection. Check for firmware updates available through the mobile app‚ as these often include connectivity improvements.
Confirm that your router’s firewall isn’t blocking the thermostat’s access. If problems continue‚ attempt a factory reset of the thermostat’s network settings and re-establish the connection. Consult the Braeburn support website for specific troubleshooting steps related to your model.
Braeburn Thermostat Error Codes & Meanings
Braeburn thermostats utilize error codes to diagnose system malfunctions. A “Low Battery” indication signals the need for battery replacement‚ impacting operational reliability. “E1” often denotes a sensor failure‚ requiring professional assessment. “E2” typically indicates a communication error between the thermostat and the HVAC system‚ potentially stemming from wiring issues. “E3” suggests a heating or cooling demand conflict.
Consult the specific model’s documentation for a comprehensive error code list. Ignoring these codes can lead to prolonged system inefficiencies or damage. Contacting a qualified HVAC technician is recommended for resolving complex error codes beyond basic troubleshooting steps.

Replacing Batteries (if applicable)
For Braeburn thermostats requiring batteries‚ replacement is crucial for continued operation. Locate the battery compartment‚ typically on the side or back of the unit. Gently open the compartment and note the battery type – usually AA or AAA. Remove the old batteries‚ observing correct polarity (+ and -). Insert fresh batteries‚ ensuring proper alignment.
A “Low Battery” warning on the display indicates imminent battery failure. Replace batteries promptly to avoid losing programmed settings or system control. Some models retain settings briefly during battery changes‚ while others may require reprogramming. Refer to your specific model’s manual for detailed instructions.
Wi-Fi Setup and Mobile App Integration (if applicable)
If your Braeburn thermostat supports Wi-Fi‚ connecting it unlocks remote control and advanced features via a mobile app. Download the official Braeburn app from your device’s app store (iOS or Android). Ensure your home Wi-Fi network is active and you have the password readily available.
Within the app‚ follow the on-screen instructions to add your thermostat. This typically involves putting the thermostat into pairing mode – consult your model’s manual for specific steps. Once connected‚ you can adjust temperature settings‚ create schedules‚ and monitor energy usage remotely. The app may also provide alerts for system issues or extreme temperatures.
Resetting Your Braeburn Thermostat
Resetting your Braeburn thermostat can resolve minor operational glitches or restore factory settings. Before resetting‚ understand that all custom settings – schedules‚ temperature preferences‚ and Wi-Fi connections – will be erased. The reset procedure varies by model; consult your specific thermostat’s manual for detailed instructions.
Generally‚ a reset involves accessing the thermostat’s settings menu‚ often through a combination of button presses. Look for options like “Factory Reset” or “Default Settings.” Confirm your choice when prompted. After the reset‚ you’ll need to reconfigure the thermostat‚ including setting the date‚ time‚ and desired heating/cooling schedules.
Safety Precautions and Warnings
Prioritize safety during installation and operation. Always disconnect power at the breaker box before working with wiring to prevent electrical shock. Incorrect wiring can damage the thermostat or your HVAC system‚ potentially creating a fire hazard. If you are uncomfortable with electrical work‚ consult a qualified HVAC technician.
Do not expose the thermostat to excessive moisture or extreme temperatures. Keep it away from direct sunlight and sources of heat. This device is designed for indoor use only. Avoid forceful impact or disassembly‚ as this could compromise its functionality and safety features. Regularly inspect wiring for damage and replace as needed.
Warranty Information

Braeburn Thermostats are warranted against defects in materials and workmanship for a period of one (1) year from the date of purchase. This warranty covers repair or replacement of the defective product‚ at Braeburn’s discretion. To obtain warranty service‚ you must provide proof of purchase and return the product to the original point of sale or a designated Braeburn service center.
This warranty does not cover damage caused by improper installation‚ misuse‚ abuse‚ neglect‚ accidents‚ or unauthorized modifications. It also excludes normal wear and tear. Braeburn disclaims all implied warranties‚ including merchantability and fitness for a particular purpose. This warranty gives you specific legal rights‚ and you may have other rights which vary by location.
Where to Find Additional Support & Manuals
For comprehensive support and to access a wide range of Braeburn thermostat manuals‚ visit the official Braeburn website. There‚ you’ll find downloadable PDFs for various models‚ including the 8400 series and the 5020-5220 installer guide‚ available in multiple languages like Spanish. You can also explore frequently asked questions (FAQs) and troubleshooting guides to resolve common issues independently.
Additionally‚ contacting Braeburn’s customer support team directly via phone or email provides personalized assistance. Online HVAC forums and communities can also offer valuable insights and peer-to-peer support. Remember to have your thermostat model number readily available when seeking assistance.