This manual provides a comprehensive guide for installing and maintaining the Aprilaire 500 humidifier. It covers essential steps, safety precautions, and troubleshooting tips for optimal performance.
1.1 Overview of the Aprilaire 500 Humidifier
The Aprilaire 500 is a whole-house humidifier designed to provide consistent moisture levels in homes. It is known for its energy efficiency and quiet operation, making it a popular choice for homeowners. The unit is compatible with most HVAC systems and can cover homes up to 3,000 square feet. It features a built-in bypass damper and a digital humidistat for precise humidity control. The Aprilaire 500 is also relatively low maintenance, with a replaceable water panel that ensures clean operation. Its compact design allows for easy installation in various spaces, including attics or basements. This humidifier is an excellent solution for maintaining indoor air quality and comfort during dry seasons.
1.2 Importance of Proper Installation
Proper installation of the Aprilaire 500 humidifier is crucial for ensuring optimal performance, efficiency, and safety. Incorrect installation can lead to reduced humidity control, increased energy bills, and potential damage to the unit or HVAC system. It also poses safety risks, such as water leakage or electrical hazards. A well-installed system ensures consistent moisture levels, prevents over-humidification, and maintains indoor air quality. Additionally, correct installation prolongs the lifespan of the humidifier and its components. Following the manual’s guidelines ensures compliance with manufacturer recommendations, which may be required for warranty validation; Proper installation also helps avoid common issues like mold growth or uneven humidity distribution, ensuring a comfortable and healthy living environment.
Pre-Installation Requirements
Ensure compatibility with your HVAC system, gather necessary tools, and follow safety guidelines before starting the installation. Prepare materials as outlined in the manual.
2.1 Checking the System Compatibility
Before installing the Aprilaire 500, ensure it is compatible with your HVAC system. Verify the humidifier’s specifications match your system’s requirements, including voltage (24V) and airflow capacity. Check that the unit fits the installation space and aligns with your home’s ductwork layout. Confirm the water supply and drainage options are feasible. Ensure the humidistat is compatible with your existing thermostat or HVAC controls. Refer to the manual for specific compatibility guidelines and recommended configurations. Proper system compatibility ensures efficient operation and prevents installation issues. Incompatible setups may lead to reduced performance or malfunction. Always consult the manufacturer’s guidelines for precise compatibility details.
2.2 Gathering Necessary Tools and Materials
To ensure a smooth installation, gather all required tools and materials beforehand. You will need a drill, screwdrivers (Phillips and flathead), wrenches, pliers, and a utility knife. Additional materials include ductwork components, water supply hoses, drainage tubing, electrical wires, and mounting screws. Ensure you have a voltage tester for safe electrical connections. Refer to the manual for specific hardware requirements, such as the correct size of screws or adapters. Having all tools and materials ready saves time and prevents delays during the process. Organize the items in a workspace for easy access. Double-check the list to avoid missing any critical components. Proper preparation is key to a successful installation.
2.3 Safety Precautions Before Starting
Before beginning the installation, ensure all safety precautions are taken to avoid accidents. Disconnect the power supply to the HVAC system and water supply lines to prevent electrical shocks or water damage. Wear protective gear, including gloves and safety goggles, when handling tools or materials. Ensure the work area is clear of clutter and well-ventilated. Avoid open flames or sparks near the installation site. Turn off the main water supply valve to prevent unexpected water flow. Double-check that all components are properly grounded to prevent electrical hazards. Keep children and pets away from the workspace. Follow all local safety codes and manufacturer guidelines. Taking these precautions ensures a safe and successful installation process.
Installation Process
The installation involves mounting the unit, connecting water supply, installing drainage, wiring the humidifier, and setting up bypass ductwork for efficient operation and integration with your HVAC system.
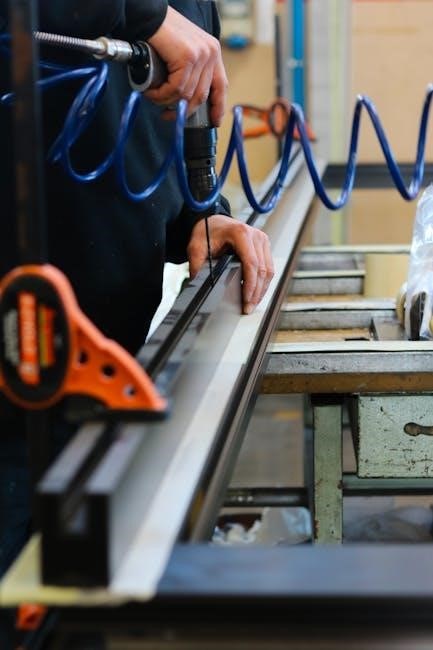
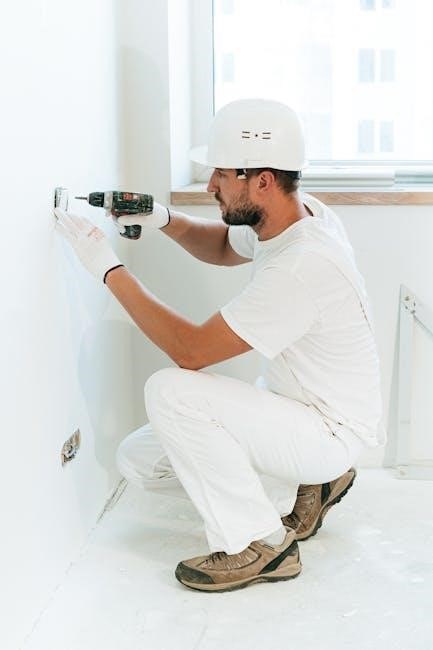
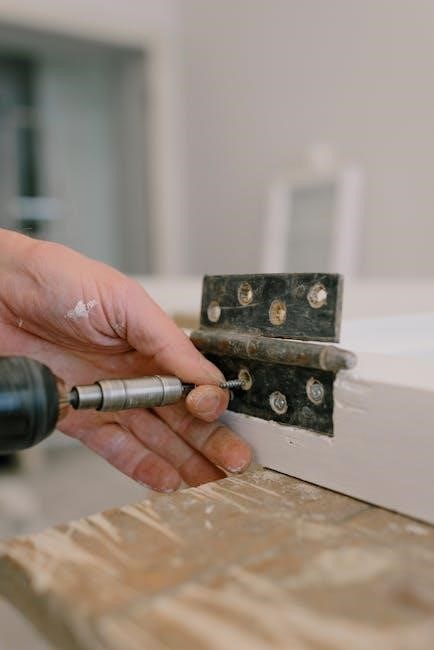
3.1 Mounting the Aprilaire 500 Unit
MOUNTING the Aprilaire 500 unit requires careful planning to ensure proper installation. First, choose a suitable location near the HVAC system for easy integration. Ensure the surface is level and sturdy to support the unit’s weight. Use the provided mounting hardware to secure the humidifier firmly to the wall or floor. Refer to the manufacturer’s specifications for optimal placement, avoiding areas prone to moisture or direct sunlight. Once mounted, double-check the unit’s alignment and stability to prevent vibration or movement during operation. Proper mounting is critical for efficient performance and longevity of the humidifier.
3.2 Connecting the Water Supply Hose
CONNECTING the water supply hose to the Aprilaire 500 is a crucial step for proper humidifier operation. Begin by turning off the main water supply to avoid any leaks. Cut the water supply line to the appropriate length using a tubing cutter. Attach one end of the hose to the water solenoid valve on the humidifier, ensuring a secure connection. Route the other end to a nearby water supply line, installing a saddle valve if necessary. Tighten all connections firmly to prevent leaks. Once connected, turn the water supply back on and check for any signs of leakage. Proper installation ensures consistent water flow, essential for maintaining optimal humidity levels in your home.
3.3 Installing the Drainage System
INSTALLING the drainage system for the Aprilaire 500 ensures proper water disposal and prevents damage from condensation. Locate a suitable drain near the humidifier, such as a floor drain or utility sink. If no nearby drain exists, install a condensate pump to direct water to a remote location. Attach the drain hose to the humidifier’s drainage port, ensuring a secure connection. Route the hose to the drain, maintaining a slight downward slope to prevent water from pooling. Use drainage tubing and fittings provided in the installation kit to complete the connection. Once installed, test the system by running water through it to ensure proper flow and check for leaks. A well-installed drainage system is essential for maintaining the humidifier’s efficiency and preventing water damage.
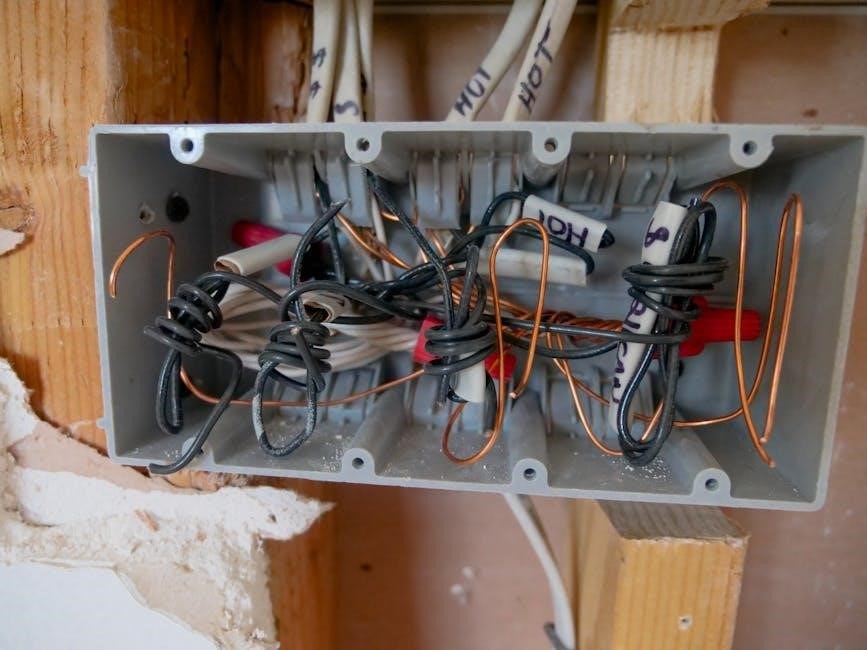
3.4 Wiring the Humidifier to the HVAC System
WIRING the Aprilaire 500 to your HVAC system ensures proper operation and integration with your home’s heating and cooling setup. Begin by disconnecting the power supply to the HVAC system for safety. Locate the humidistat, typically mounted on the furnace, and connect the wires according to the manual. Use 18-2 thermostat wire to link the humidifier to the HVAC control board. Connect the 24V power supply from the furnace to the humidifier’s solenoid valve. Ensure all connections are secure and properly insulated. Finally, test the wiring by running the HVAC system in “heat” mode to verify the humidifier activates correctly. Proper wiring ensures synchronized operation between the humidifier and your HVAC system, optimizing performance and humidity control.
3.5 Setting Up the Bypass Ductwork
Setting up the bypass ductwork for the Aprilaire 500 ensures proper airflow when the HVAC system is not actively heating or cooling. Begin by cutting a 6-inch diameter hole in the return air duct, then install the bypass damper. Attach the bypass duct to the humidifier outlet and secure it to the damper using screws and sealing tape. Ensure the duct is airtight to prevent leaks. Connect the other end of the bypass duct to the bypass grille on the supply side of the HVAC system. This setup allows excess moisture to bypass the HVAC system and circulate through the home. Proper installation ensures efficient humidity distribution and prevents over-humidification. Test the bypass operation by running the HVAC fan to confirm airflow through the ductwork.
Post-Installation Steps
After installation, test the humidifier operation, adjust the humidistat settings, and ensure proper airflow. Verify there are no leaks or damage to the system components.
4.1 Testing the Humidifier Operation
After installation, disconnect the power source and remove the cover to inspect internal components. Check for proper water flow and ensure the solenoid valve operates correctly. Turn on the HVAC system and verify the humidifier activates when humidity levels drop. Inspect the bypass ductwork for proper airflow and ensure there are no leaks in the water supply or drainage lines. Refer to the manufacturer’s manual for specific testing procedures. Make sure all electrical connections are secure and functioning. Test the humidistat by adjusting the settings to verify accurate humidity control. Address any issues immediately to ensure optimal performance and prevent future malfunctions.
4.2 Adjusting the Humidistat Settings
Adjusting the humidistat settings ensures the Aprilaire 500 operates efficiently and maintains desired humidity levels. Locate the humidistat, typically mounted near the HVAC system, and turn the dial to set the preferred humidity level. For digital models, press the buttons to adjust the settings. Calibration may be needed to match your home’s specific conditions. Refer to the manual for guidance on precise calibration steps. Ensure the settings align with the manufacturer’s recommendations for optimal performance. After adjusting, monitor the system to confirm consistent humidity levels. If unsure, consult the installation manual or contact a professional for assistance. Proper settings prevent over-humidification and ensure energy efficiency.
4.3 Ensuring Proper Airflow
Proper airflow is crucial for the Aprilaire 500 to function effectively. Ensure that all ductwork is clear of obstructions and that the bypass duct is properly installed. Regularly inspect the system for blockages, such as dust buildup or debris, which can restrict airflow. Maintain a consistent temperature in your home to help the humidifier regulate moisture levels evenly. Ensure that all vents and grilles are open and unobstructed to allow for adequate air circulation; If airflow is restricted, the humidifier may not perform efficiently, leading to inconsistent humidity levels. Proper airflow also helps prevent mold growth and ensures the system operates quietly and effectively.
Maintenance and Upkeep
Regularly clean the water panel and drain to prevent mineral buildup. Replace the filter annually and check for leaks to ensure efficient operation and longevity.
5.1 Cleaning the Aprilaire 500 Filter
To clean the Aprilaire 500 filter, first, turn off the power to the humidifier. Locate the filter, typically found in the base or side panel, and remove it by pulling it out or unscrewing the retaining clips. Soak the filter in a mixture of warm water and mild detergent for 30 minutes to loosen dirt and debris. Use a soft-bristled brush to gently scrub away any stubborn buildup. Rinse thoroughly with clean water and allow it to dry completely before reinstalling. Repeat this process every 1-3 months, depending on usage, to ensure optimal performance and prevent mold growth. Regular cleaning is essential for maintaining efficient humidity control and indoor air quality.
5.2 Replacing the Water Panel
To replace the water panel in your Aprilaire 500 humidifier, start by turning off both the water supply and power to the unit. Drain the water from the system to prevent spills. Locate the water panel, usually found in the base or side of the humidifier. Remove the screws or clips holding it in place and gently pull it out. Dispose of the old panel responsibly. Take the new water panel and insert it into the same position, ensuring it is securely fastened with the provided screws or clips. Restore the water supply and power, then check for leaks. Replace the water panel every 6-12 months, depending on usage and water quality, to maintain efficient operation and prevent mineral buildup. This step is crucial for optimal humidity control and system longevity.
5.3 Checking for Leaks and Damage
Regularly inspect the Aprilaire 500 humidifier for leaks and damage to ensure proper function and prevent water damage. Start by turning off the power and water supply to the unit. Visually examine the water supply line, drain hose, and connections for any signs of moisture or wear. Check the humidifier’s pan and drain system for mineral buildup or blockages. If you find leaks, tighten any loose connections or replace worn-out gaskets. Inspect the unit’s casing for cracks or dents that could compromise its integrity. Addressing these issues promptly will help maintain efficiency and prevent costly repairs. Schedule regular inspections to catch potential problems early and ensure the system operates safely and effectively.
5.4 Scheduling Annual Maintenance
Scheduling annual maintenance for your Aprilaire 500 humidifier ensures optimal performance and longevity. Plan this service during the off-season when the humidifier is not in use. Hire a qualified HVAC technician to inspect and clean the unit, including the water panel, drain system, and electrical components. They will also check for any worn-out parts that need replacement. Regular maintenance helps prevent issues like mold growth, mineral buildup, and inefficiency. Additionally, ensure the humidistat is calibrated correctly and the bypass ductwork is functioning properly. Annual maintenance not only improves indoor air quality but also reduces the risk of unexpected breakdowns. Keep a record of all maintenance activities to track the system’s condition over time.
Troubleshooting Common Issues
This section addresses frequent problems with the Aprilaire 500, such as water flow issues, leaks, or uneven humidity. It provides step-by-step solutions for quick resolution.
6.1 No Water Flow to the Humidifier
If the Aprilaire 500 humidifier is not receiving water, start by checking the water supply line for kinks or blockages. Ensure the water solenoid valve is functioning properly, as it controls water flow. Verify that the humidistat is set correctly to activate the humidifier when needed. Additionally, inspect the bypass duct for obstructions, as this can disrupt proper operation. If issues persist, consult the installation manual or contact a professional for assistance. Always follow safety guidelines when troubleshooting electrical components.
6.2 Excessive Water Leakage
Excessive water leakage from the Aprilaire 500 humidifier can be caused by a faulty water solenoid valve, improper installation of the water supply line, or clogged drainage systems. To address this, first, turn off the water supply to the unit and inspect the solenoid valve for any blockages or mineral buildup. Ensure all connections are secure and not loose. Check the drain line for obstructions and verify that it is properly sloped to prevent water from accumulating. If the issue persists, consider replacing the water solenoid valve or consulting a professional to diagnose and repair any underlying problems. Regular maintenance can help prevent such issues and ensure efficient operation.
6.3 Inconsistent Humidity Levels
Inconsistent humidity levels in the Aprilaire 500 humidifier can result from improper humidistat calibration, faulty water solenoid valves, or issues with the bypass ductwork. Begin by checking the humidistat settings to ensure they align with your desired humidity levels. Next, inspect the water solenoid valve for mineral buildup or blockages, which may prevent proper water flow. Additionally, verify that the bypass ductwork is correctly installed and unobstructed, as poor airflow can disrupt humidity distribution. If these steps do not resolve the issue, consider replacing the humidistat or solenoid valve. Regular maintenance, such as cleaning the water panel and filter, can also help maintain consistent humidity levels and overall system performance.
Replacement Parts and Accessories
Key replacement parts include the water solenoid valve, humidistat, and bypass ductwork components. Accessories like installation kits ensure proper functionality and system longevity.
7.1 Water Solenoid Valve Replacement
Replacing the water solenoid valve is crucial for maintaining proper water flow in the Aprilaire 500 humidifier. To begin, ensure the unit is disconnected from power. Next, locate the valve, typically found near the water supply line. Disconnect the water supply hose and electrical connections carefully. Remove the old valve by loosening any retaining clips or bolts. Install the new valve by securing it firmly and reconnecting the lines. Finally, test the system to ensure water flows correctly without leaks. This replacement ensures efficient humidification and prevents potential water damage. Always refer to the manufacturer’s guidelines for specific instructions tailored to your model.
7.2 Humidistat Replacement
Replacing the humidistat on your Aprilaire 500 ensures accurate humidity control. Start by turning off power to the humidifier. Locate the humidistat, usually mounted near the HVAC system. Disconnect the electrical wires connected to the old unit. Remove the mounting screws to take out the old humidistat. Install the new one by securing it with screws and reconnecting the wires according to the manufacturer’s wiring diagram. Finally, test the system to ensure proper humidity regulation. Regular replacement of the humidistat maintains optimal performance and prevents issues like over-humidification or insufficient moisture. Always follow the installation manual for specific instructions.
7.3 Bypass Ductwork Components
The bypass ductwork components are essential for directing airflow from the HVAC system to the Aprilaire 500 humidifier. These components include the bypass duct, damper, and adapter. Proper installation ensures efficient moisture distribution throughout your home. Use the correct size and material for the ductwork to maintain airflow efficiency. Install the damper to regulate air diversion to the humidifier. Ensure all connections are secure and insulated to prevent leaks. Regularly inspect the ductwork for damage or blockages to maintain optimal performance. Follow the installation manual for specific sizing and configuration recommendations. Properly installed bypass ductwork ensures consistent humidity levels and reduces energy consumption. Always use compatible parts to avoid system malfunctions.
Completing the Aprilaire 500 installation ensures proper humidification and system longevity. Follow the manual for optimal performance, energy efficiency, and consistent indoor air quality. Regular maintenance and adherence to guidelines are crucial for sustained functionality and comfort.
8.1 Summary of Key Installation Steps
Key installation steps include disconnecting power, removing cover screws, and accessing the lamp. Mount the Aprilaire 500 unit securely, connect the water supply hose, and install the bypass ductwork. Wire the humidifier to your HVAC system, ensuring proper connections. Post-installation, test the humidifier’s operation, adjust the humidistat, and ensure proper airflow. Regular maintenance, such as cleaning the filter and replacing the water panel, is essential for longevity. Always follow safety precautions and refer to the manual for detailed instructions; Proper installation ensures optimal performance, energy efficiency, and consistent indoor air quality. By adhering to these steps, you can enjoy the benefits of a well-functioning Aprilaire 500 humidifier.
8.2 Final Tips for Optimal Performance
For optimal performance, ensure regular maintenance, such as cleaning the filter and replacing the water panel. Check for leaks and damage periodically to prevent issues. Adjust the humidistat settings according to your comfort needs and seasonal humidity levels. Proper airflow is crucial, so verify that all ductwork connections are secure and unobstructed. Consider upgrading to a programmable thermostat for better control; Always refer to the manual for specific instructions and troubleshooting guidance. Schedule annual professional maintenance to ensure the system runs efficiently. By following these tips, you can extend the lifespan of your Aprilaire 500 and enjoy consistent indoor air quality throughout the year.

Additional Resources
For further assistance, refer to the official Aprilaire website, user forums, and authorized dealers for replacement parts, troubleshooting guides, and updated manuals specific to the Aprilaire 500 model.
9.1 Manufacturer Support and Manuals
Aprilaire offers comprehensive support through their official website, providing detailed manuals, troubleshooting guides, and replacement part lists for the Aprilaire 500 model. Users can access downloadable PDF manuals, which include step-by-step installation instructions, maintenance schedules, and warranty information. Additionally, the manufacturer provides a customer service hotline and email support for addressing specific inquiries or technical issues. The website also features a section dedicated to FAQs, addressing common concerns and offering solutions. For those seeking physical copies, manuals can be requested directly from Aprilaire’s customer service team. These resources ensure that users have access to reliable and official information to maintain and repair their humidifier effectively. By utilizing these resources, homeowners can ensure optimal performance and longevity of their Aprilaire 500 system.
9.2 Online Forums and Community Help
Online forums and community platforms provide valuable support for Aprilaire 500 installation and maintenance. Websites like Reddit and HVAC forums host discussions where users share tips, troubleshooting advice, and personal experiences. Many threads focus on common issues such as bypass ductwork installation, water solenoid valve replacements, and humidistat calibration. DIY enthusiasts and professionals alike contribute to these communities, offering practical solutions and insights. These forums are especially helpful for resolving specific problems or clarifying installation steps. Users often find quick answers to common issues, enabling them to maintain their systems effectively. While these resources are not official, they complement the manufacturer’s support by offering real-world advice and shared experiences. Always verify advice from trusted sources to ensure accuracy and safety.